All mounts for artifacts that are going on display need to be well enough made that they are not ugly or obtrusive. A good display mount is first functional, and then as unobtrusive as possible. The observer’s eye acknowledges the mount but does not concentrate on it. There is nothing quite so distracting to a small mounted artifact than a crudely finished Plexiglas base. This is because the nature of Plexiglas calls for crisp lines and defined and transparent edges.
Choose mount materials for their inertness, appropriateness to the job and their unobtrusive appearance. Light is reflected and refracted differently through clear plastic than other materials. Wood, for example, is different than plastic and should be treated in such a way that it harmonizes. Imagine a fine print framed with a mat that has crookedly cut edges. Or the fabric-covered base of a display case covered in creases. Work neatly and carefully, even if it takes a considerable amount of extra time.
Often the display mounts in a museum will be made with the material which is most familiar to the staff member responsible for them. This is fine up to a point, but there are cases where some materials are used in excess and may not be the most appropriate for the job. For example, displays where everything has been mounted with Plexiglas can distract from the main point of the exhibit.
Mounts must not have an effect on the object. Barrier materials, such as Mylar, should separate objects from potential damage, such as painted surfaces.
There are two basic types of mounts:
1. Custom made and fit.
2. General (shelves, stock forms).
In order to construct mounts, you need to be familiar with basic hand tools and how to use them. This does not mean you have to be craftsmen or machinists, but a minimum basic competence is necessary.
Also, you need to look closely at the object and read through all of its documentation, especially conservation reports. Discuss potential problems with a conservator.
BASIC MOUNT MAKING RULES
1. No object should be altered to suit the mount.
2. Support objects completely. Check how the object is made and where it is stable/unstable and where a mount can be put safely. Weak material, such as unfired pottery, needs as much support as possible.
3. Place object at it’s center of gravity. If it is placed off center, you introduce stress.
4. Make patterns for your mounts. Do not try an unfinished mount on the artifact. Make a mock object, if necessary. Analyze the pattern to see how the mount is to be placed. After fabricating the mount, place it next to the object, as close as possible without touching it. If it provides good support, clean and pad the mount before fitting it on the artifact.
EXHIBIT OBJECT MOUNTING GUIDELINES
(Copied from U.S. Park Service Guidlines)
There are many different methods of constructing an exhibit mount for any one object, however, all must be governed by the criterion that they provide long-term protection for the object while on exhibit. The exhibit mount is where the object comes into physical contact with the exhibit, and careful design and construction of mounts is necessary to avoid introducing a new source of damage for the object.
Mounts should be designed to protect their objects during the total period of the exhibition. A properly mounted object is protected from slippage, jarring, and other movements due to air currents, ambient vibration, and visitor movement. Exhibit mounting is critical to the preservation of the displayed materials and requires a set of highly complex skills. It is convenient to separate exhibit mounts into two categories which represent their complexity and accordingly the skills required of the mount maker.
TYPE OF MOUNTS:
Type 1: Custom fit, object specific mounts
.Requires object handling, measurement and fitting .Frequently requires consultation with a conservator .Requires design and fabrication by highly qualified, mounting specialist
Type 2: Generic, non-fitted mounts
.Requires no object handling and fitting .Requires only rough measurements Generally requires no consultation with a conservator .Requires no special qualifications of its mount fabricator
A. MOUNT DESIGN
GUIDELINES:
1. No object can be altered or repaired to accommodate exhibit mounting.
2. Mounts should provide adequate support to prevent physical stress or unbalanced weight distribution on the object. The object’s center of gravity or original intended attitude should be considered.
3. No mount should be permanently attached to any object and easy access to the object should be afforded for curatorial maintenance and emergency removal.
4. The fastening system must be based on a mechanical design and not adhesives or sticky substance.
5. Mounts must anticipate in their design the tendency for organic materials to droop, sag, or experience dimensional changes.
6. Vibration and abrasion should be minimized by the nature of mount’s design and material selected for construction.
7. Susceptible objects should not be subjected to creasing and folding or deformation by the placement of heavy objects directly on tip of them.
8. Fragile objects, including all textiles, should be supported over a great an area as practical.
9. The mount must secure objects that are displayed in the open to be reasonably safe from theft.
B. FASTENING AND MATERIAL SELECTION:
GUIDELINES:
1. Original objects must not be drilled, trimmed, tracked, nailed, screwed down or glued down. (NO use of museum wax, silicone rubber, or tapes).
2. Fastening system must be based on a mechanical design and not an adhesive or sticky substance.
3. Original clamps, hooks, strings, straps already attached to objects should not be used for support or to take the weight of the object.
4. An object should never be forced to fit in a bracket, cradle or other exhibit space. Straps or brackets should support and hold objects, not distort or scratch them). Cradles should gently support objects, not compress them.
5. Exhibit mounts should employ inert materials, particularly in the areas of contact with artifacts.
6. Mounts should not utilize unstable dyed fabrics and materials. these colorants can be transferred to the display object and therefore testing of fabrics is required.
7. Sharp edges should be removed from all materials in in close proximity to the displayed object and padding used whenever necessary.
8. Only high quality padding and cushioning materials should be used: polyethylene foam, polyester batting and felt material, 100% cotton fabric, acid-free buffered tissue paper.
9. Metal and wood products must be sealed with conservation-approved coatings.
10. High grade, conservation approved, manikin or other supports may be used as a display of garments. They may be constructed and padded with inert materials (i.e., polyester fiberfill, polyethylene foam) or buffered from direct contact with cotton fabric.
11. Muslin linings and backing are often needed to reinforce and protect these garments and other textiles. These are to be applied by qualified conservator.
12. Persons measuring, fitting or installing objects on their mounts will wear clean gloves to prevent soiling of the object. (Glazed ceramics and glass objects are the exception).
Books and products we recommend:
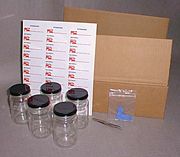
 Materials Testing Kit Acid fumes are a danger to any collection. This kit provides information and supplies to aid in the testing of construction materials. The Materials Testing Kit includes 24 glass jars, acid detection strips, tweezers, silver coupons, lead coupons, aluminum foil, 1 sheet of preprinted labels and an instruction manual.
| Materials Testing Kit | $120.00 | |
|
Polished lead coupons (24) | $22.15 | |
|
Polished silver coupons (24) | $24.95 | |
| Materials Testing Kit Booklet | $15.00 |
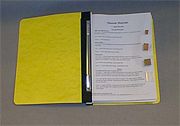
 Museum Materials sample booklet Ordering archival supplies can be difficult and confusing. This booklet provides sample materials of the most common supplies currently offered and discusses how they are used in museums. Organized by function, the booklet covers rigid materials, padding materials, ties and attachments, barrier materials and "bad" materials.
| Museum Materials sample booklet | $45.00 |
 CCI Tech Bulletin #14 Working with Polyethylene Foam and Fluted Plastic Sheet by Carl Schlichting
Examines several techniques and illustrates a series of basic approaches that have been developed for working with polyethylene foam and fluted plastic. The many detailed illustrations clarify for the reader the fabrication methods described in the text.
| Working with Polyethylene Foam & Fluted Plastic | $18.00 |
NSCC Museum Materials Training Workshop
Links to related information on other sites:
Archival Mounts For Paintings On Textiles
http://www.bishopmuseum.org/research/pdfs/cnsv-mounts.pdf
Polyester Film Book Supports (Conserve-O-Gram 18/1) – (An Adobe PDF file)
http://www.cr.nps.gov/museum/publications/ conserveogram/18-01.pdf
Window Mats for Paper Objects (Conserve-O-Gram 13/1) – (An Adobe PDF file)
http://www.cr.nps.gov/museum/publications/ conserveogram/13-01.pdf
Polyester Encapsulation (Conserve-O-Gram 13/3) – (An Adobe PDF file)
http://www.cr.nps.gov/museum/publications/ conserveogram/13-03.pdf
Exhibit Mounting Variations for Objects on Paper (Conserve-O-Gram 13/4)
http://www.cr.nps.gov/museum/publications/ conserveogram/13-04.pdf
Information on Costume Mounting (mannequins)
http://dept.kent.edu/museum/staff/mount.html
