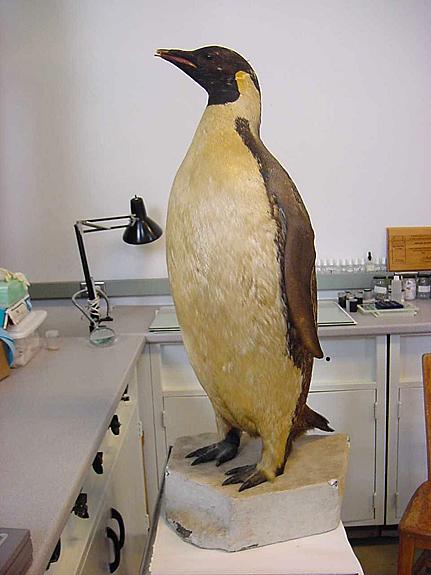
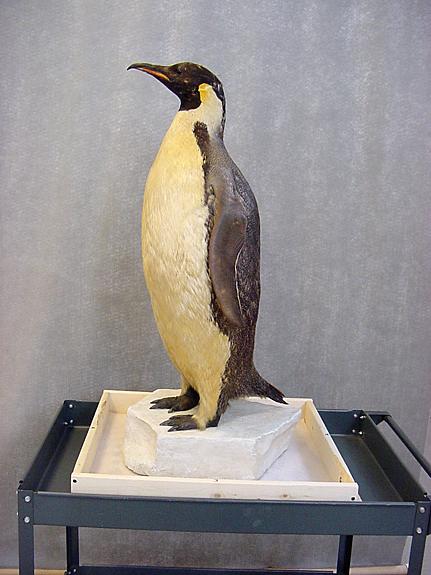
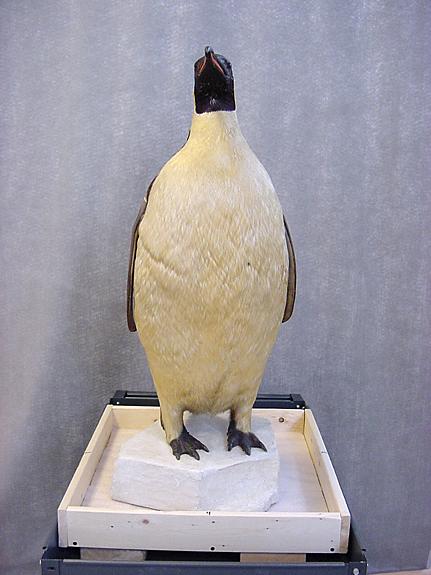
OBJECT: Emperor Penguin, known as "Oscar" OWNER: Carleton College Archives PROVENANCE: Collected by Larry Gould, professor and administrator at Carleton College, during the 1929/1930 Byrd expedition to the south pole. MATERIALS: Feathers, paint, plaster, iron mesh, possibly straw, copper alloy pins, glass, wood. DIMENSIONS: L: 19 ½ inches W: 18 inches H: 38 ½ inches PHOTOGRAPHS TAKEN: ___ B&W __x_Color print __x__Electronic DESCRIPTION:
|
| | |
|
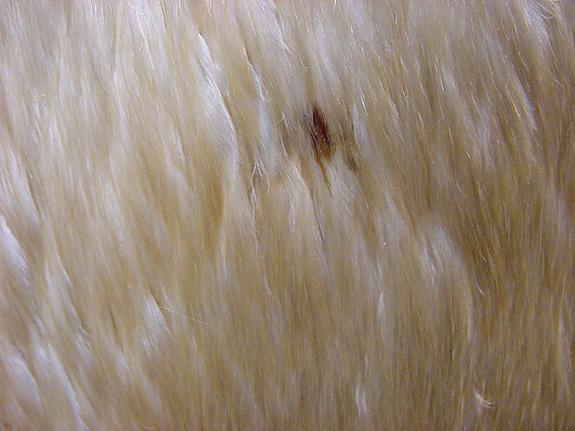
CONDITION REPORT: Dirt and Grime: Overall dusty and slight grime. Most noticeable on lighter feathers (dark tinge to tips may be grime), plaster surface (quite grimy) and between toes. Slight film over eyes, worse on proper left. Plaster base has brown grime on the top surfaces and protrusions, especially corners. Some of the grime looks like hand and finger marks. There is less or none on vertical parts of the base. Stains and Accretions: Dark red-brown stain in front proper left center, possibly bullet wound. Four lighter brown stains in lower part of front. Small dark dots on front may be accretions or dried larval casings. They are few and far between, suggesting no active infestation. The back tips of the tail have white crusty accretions, probably plaster from making the base, possibly paint. Fly specks on the plaster base to the facing left of the tail.
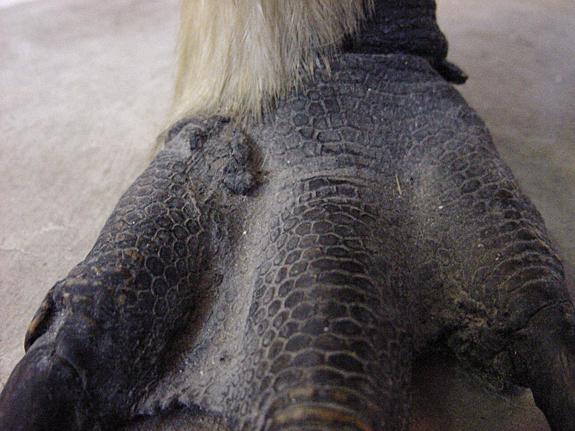
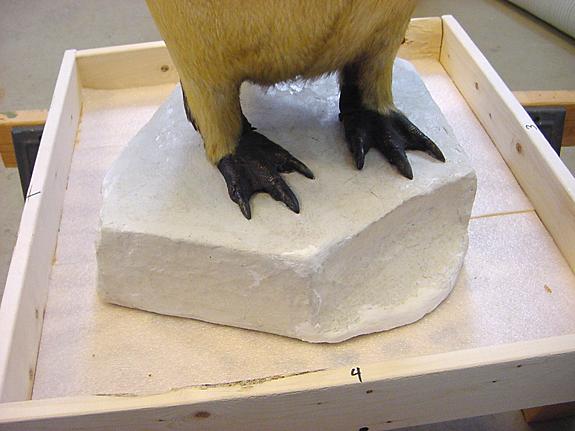
Cracks, Tears, Holes, Distortion, Abrasion, and Losses: Feet: Small pin holes in feet. At least two per foot (hard to see well because of dust build up)
Wings: Proper right wing: two small areas of feather loss near tip; line at top of wing suggests some feather loss or pulling of the wing. Wing is solid, however. Proper left wing: slightly looser than right wing. Feathers near back of wing slightly abraded in center. Small bump in wing about 3 inches from tip. On underside of wing, ¼ inch hole near top rear, may be from insect attack. A little webbing is visible on the underside. This wing has a lot of fibers attached to it, possibly from dusting with a cloth.
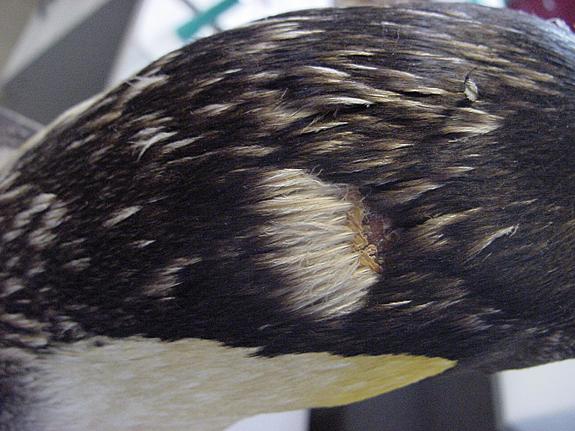
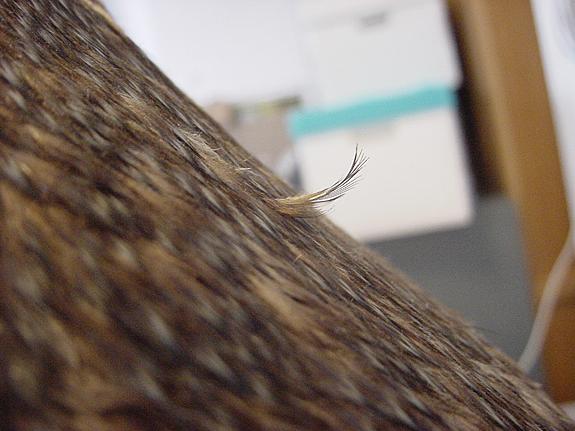
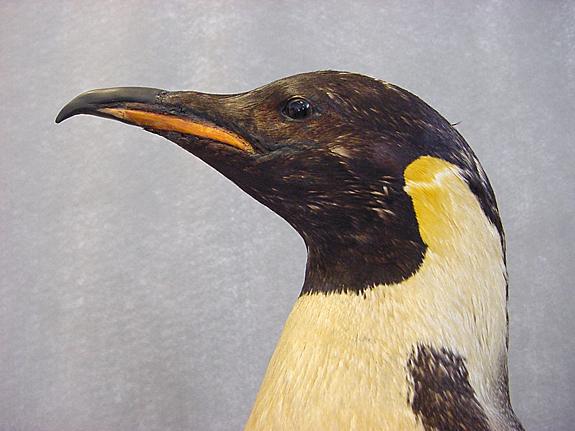
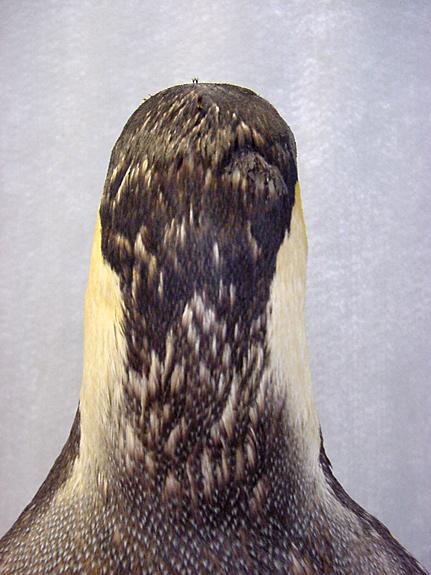
Head: Feather loss on back of head, about ¾ inch by ½ inch. Small tears and some skin lifting off of plaster sub-form in this area. One feather curled up in center back of head. Small feather lifting further near the top of the head. Two feathers on the top, proper left, are lifted, bent and cracked. Proper left side, yellow feathers show disruption (possible tear during mounting).
|
| | |
|
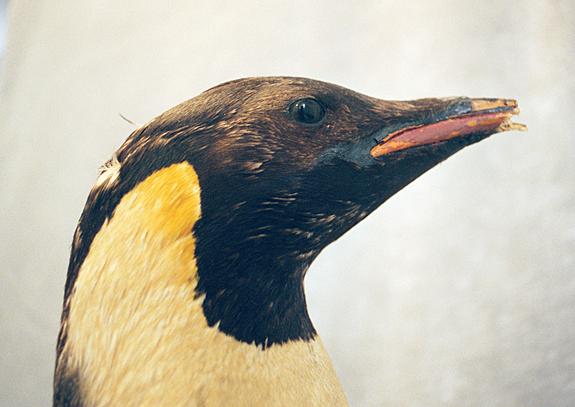
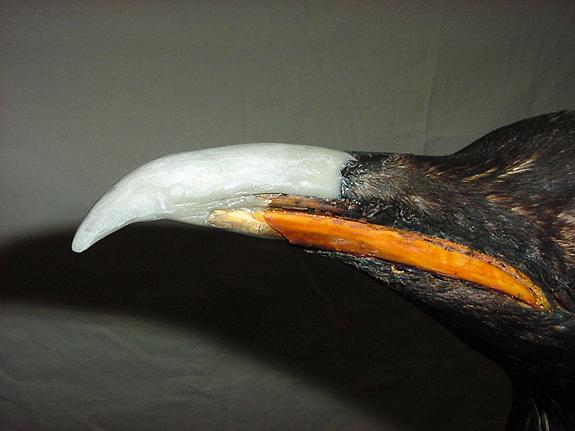
Beak: (1) Proper right side, upper lip near start of mouth has small cracks, at least 5, and a section of about an inch in length is slightly lifted. There are two slightly larger cracks at the corner of the mouth on this side. (2) Beak end missing and beak is shattered and split, suggesting loss from a fall. Top of beak has tesselated cracking in light brown area. There may be loss of about one inch of the original beak surface, covering this area originally.
|
| | |


|
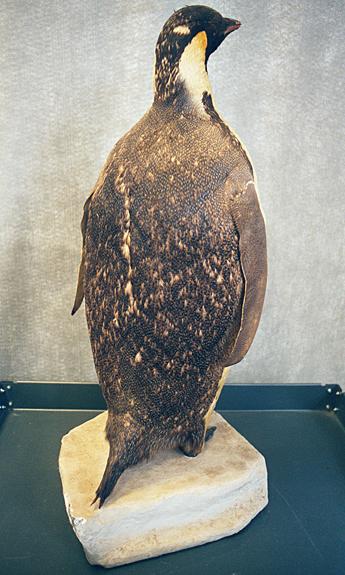
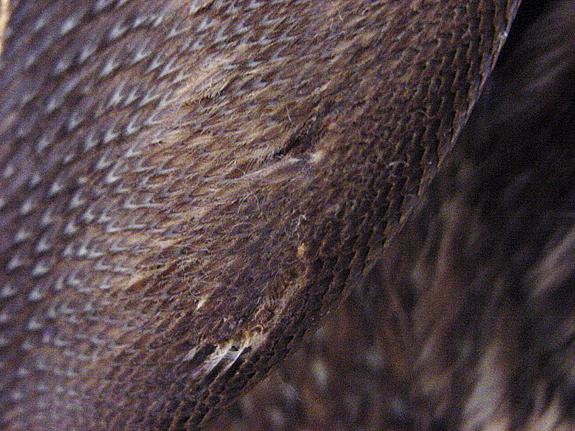
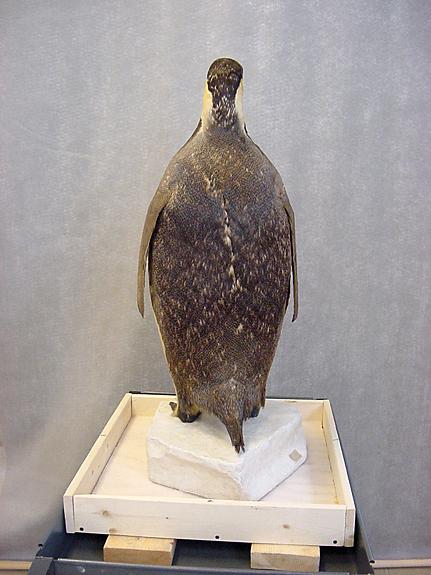
Body: Proper right back, large area of distorted and abraded feathers, about 9 ½ inches by 6 inches. Scattered "ruffled" look to feathers on the back, may be due to handling. One feather curled up near top of back, to proper right of center. Eight inch line in center back may be seam where taxidermist cut skin. Tear in flesh of body from the center breast up to just below the proper right wing.
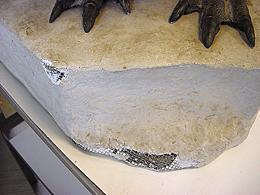
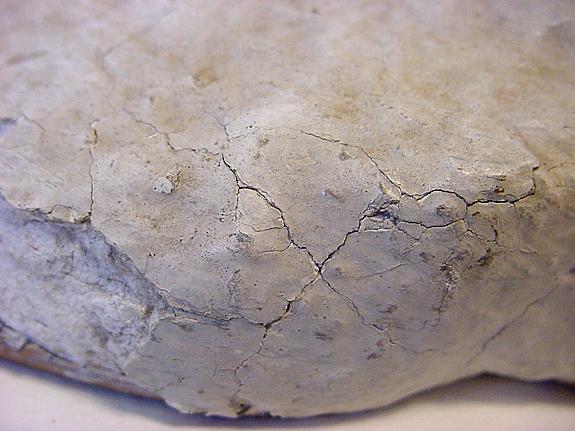
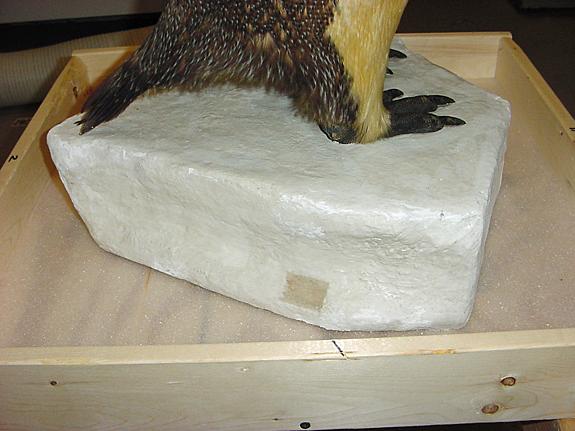
Base: Large losses in surface plaster at three of the five top corners and along the front and proper left side bottom edges of the base. The worst is at the back and front. Small losses are located on the vertical corners and the proper right side bottom. Network of cracks over all of the plaster base, with lifting and some gaping. The worst are at the corners and edges. Some of the losses have been filled during an earlier attempt at repair. Numerous dents and abrasions near the bottom edge.
|
| | |
|
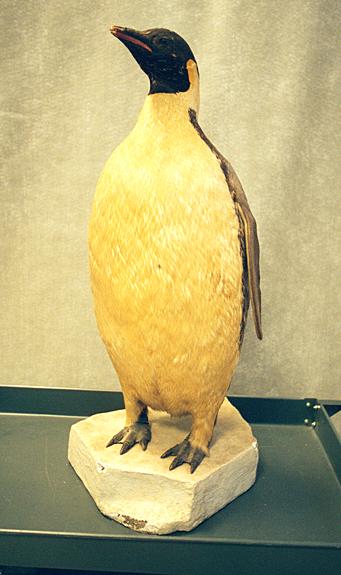
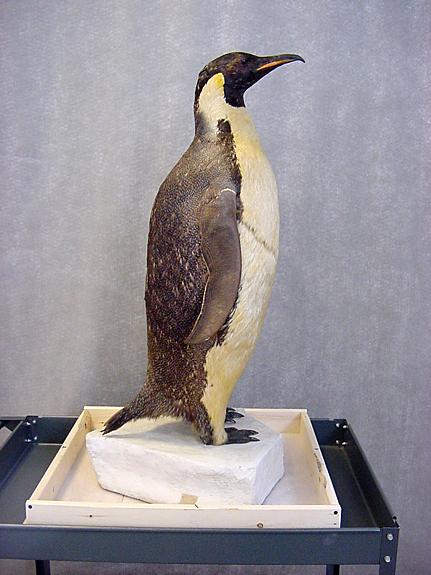
Color Alteration: Front feathers may have yellowed over time. May be able to reduce with cleaning. However, these penguins naturally have a yellowish cast. Yellowing, however, is stronger than during life. Probably from oils in flesh. Does not come off with solvent tests. Overpaint: Dark dull red paint over orange beak. Paint is cupping and flaking, especially on proper left side. About 80% of the orange part of the beak is covered. Metal Corrosion: Copper alloy pins on undersides of wings covered in blue-green powdery corrosion product.
|
|
TREATMENT: 1.) Photographed before treatment: color print and digital 2.) Tested for arsenic (results still pending) 3.) Removed loose dust by brushing into a vacuum cleaner followed by selective micro-pipette cleaning. 4.) Removed grime, from light feathers, feet, top of beak and plaster base with a combination of aqueous and solvent cleaning systems, primarily a 50/50 ethanol/distilled water mixture applied with cotton swabs.
|
| | |
|
5.) During cleaning, repositioned distorted, abraded and disturbed feathers as much as possible. However, the curled up feather at the back of the head refused to be tamed. Two feathers came loose during cleaning and repositioning. They were placed in a zip-loc baggie. 6.) After cleaning, consolidated plaster with 10% Acryloid B-72 in ethanol, applied with a sable brush. 7.) Removed red overpaint on beak manually, followed with swabs of 50/50 acetone/ethanol. Did not attempt to remove overpaint in areas that were fragile at the edge of the mouth. 8.) Consolidated interior and fragile areas of beak with 25% Acryloid B-72 in ethanol applied with a sable brush. 9.) Rebuilt end of beak with a two-part putty ("Apoxy" from taxidermy supplier) applied over a bamboo stick support. After 24 hour cure, sanded and then painted the beak with watered down acrylic paints. Black was matched by mixing: Mars Black, Raw Umber, Raw Sienna, and Burnt Sienna. Orange was matched by mixing Cadmium-Barium Orange and Burnt Sienna with a little Titanium White and Yellow Oxide, all applied as a thin wash.
|
| | |
|
10.) Rebuilt losses to plaster base with plaster of Paris applied over the original chicken wire. Tried to simulate the surface texture by brushing the last layer of plaster onto the fill area. Tried to reduce the worst cracks in the old plaster by sloping some new plaster over them. The new plaster was much too bright and noticeable. When dry, tinted it down with microcrystalline wax mixed with Raw Umber and Phthalocyanine (Monestral) Blue dry powder pigments. Rubbed with a cotton cloth for slight shine and uneven color density, to match original plaster surface. Still noticeable on close examination.
|
| | |
|
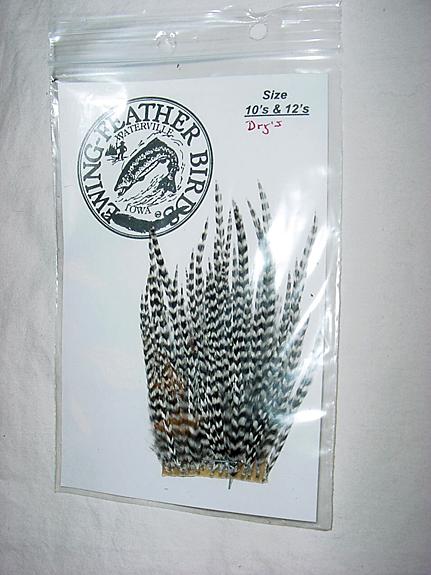
11.) Patched feather loss on back of head with striped feathers and bird skin from a fishing fly supplier (size 10’s and 12’s – drys-"Ewing-Feather birds, Waterville, Iowa"). These feathers were the correct width, but much too long and the wrong color. They were painted with acrylic paint (Burnt Sienna, Mars Black, Raw Umber and Raw Sienna) applied with a sable brush and cut down to simulate the penguin head feathers. The skin was attached to the penguin plaster inner head with Rhoplex N-580 an acrylic pressure sensitive adhesive.
|
| | |
|
12.) Built a carrying and handling crate out of plywood and cardboard, padded with Ethafoam (polyethylene foam). 13.) Photographed after treatment and completed treatment report and recommendations for long-term care.
|
| | |
| |
|
TOTAL TIME: 36.2 HOURS FUTURE CARE: CONSERVATOR: Helen Alten DATE: February 9, 2001 |